
The choice of the drill bit and the management of the engine torque are crucial for the success of a thermal auger drilling much more than the raw power of the engine. Before discussing sequential steps, we address the technical parameters that determine whether the drilling will succeed or get stuck halfway down.
Engine Torque and Bit Diameter: The Ratio That Decides Everything
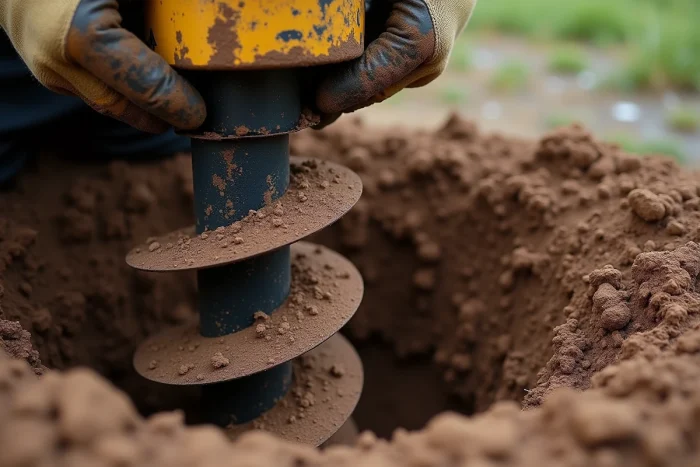
A 52 cc engine does not deliver the same useful torque whether it drives a 100 mm bit or a 300 mm bit. In compact clay soil, a wide bit puts the reducer beyond its optimal range, causing jolts and prematurely wearing out the centrifugal clutch.
Recommended read : Succeeding Online: Essential Tips to Become a Successful Entrepreneurial Blogger
We recommend to always start with a small diameter bit, then to widen the hole by switching to a larger diameter. This two-pass drilling technique reduces the load on the engine and limits the heating of the reducer.
The point of caution is at the bit-extension connection. A play of a few millimeters is enough to create an eccentricity that transmits destructive vibrations to the casing. Before each addition of an extension, it is essential to check the tightness and axial alignment. If you plan to dig a well with a thermal auger, this systematic check at every meter of depth prevents extension breakage at the bottom of the hole.
Related reading : Discover the essential nautical fashion trends for a unique and sustainable style
Management of Passes in Clay and Sandy Soil
Clay and sand require two opposing drilling strategies. Confusing the two leads to a stuck bit or wall collapse.
Compact Clay: Short Passes and Frequent Extraction
Clay sticks to the spirals of the bit and forms a plug that prevents the debris from rising. The only reliable solution is to limit each pass to about thirty centimeters, then to pull up the bit to clean it manually.
Forcing the descent without purging the spirals overloads the engine and can twist the extension. We observe that the majority of blockages in amateur drilling occur because the operator descends too quickly without extracting the debris.
Sand and Loose Soil: The Risk of Collapse
In sandy terrain, the hole closes as soon as the bit rises. Pre-tubing then becomes essential from the first centimeters. A temporary PVC tube, slightly larger than the bit diameter, is driven down as drilling progresses to maintain the walls.
Without pre-tubing in sandy soil, drilling is doomed to fail beyond two meters deep. Water-saturated sand flows back into the hole as quickly as it is extracted.
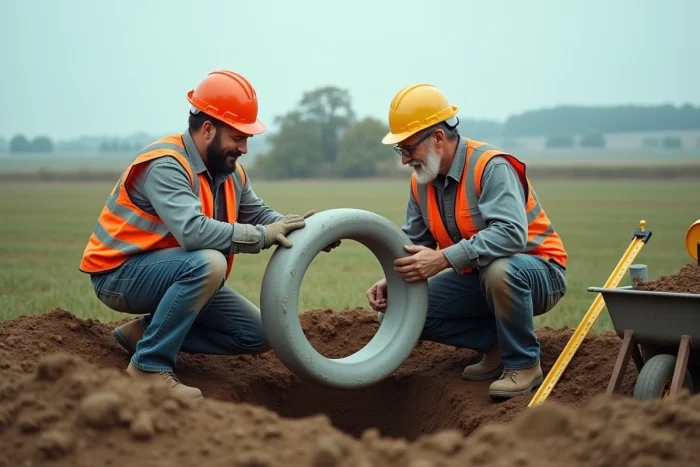
Pre-tubing and Final Tubing of the Well
The pre-tube protects the drilling during operations. The final tube, on the other hand, ensures the longevity of the structure. The two serve distinct functions and should not be confused.
- The pre-tube (rigid PVC, diameter slightly larger than the bit) is driven down by gravity or manual pressure as drilling progresses. It prevents collapses and guides the bit.
- The final tube (pressure PVC or steel depending on the targeted depth) is inserted after the removal of the pre-tube. Its lower part has a screen, a perforated or slotted section that filters particles and allows water from the aquifer to enter.
- The annular space between the final tube and the wall of the borehole is filled with filter gravel at the level of the screen, then sealed with a cement or bentonite grout at the surface to prevent polluting infiltrations.
The length of the screen must correspond to the thickness of the aquifer layer crossed. If too short, it limits the flow. If too long, it allows fine sand to enter, which clogs the pump.
Mandatory Declaration and Regulatory Framework for Domestic Drilling
Any groundwater extraction structure, even shallow and intended for garden irrigation, must be declared at the town hall in accordance with the Environmental Code (articles L.2224-9 and R.2224-22). Several prefectures have strengthened controls since 2023-2024 as part of the protection of groundwater.
Decree No. 2022-336 of March 12, 2022, imposes a physical disconnection device from the public network if the well water is used for indoor purposes (toilets, washing machines, cleaning). Non-potable water points must be indicated, even for a shallow drilling done with an auger.
The ARS may require a health check in case of a risk of pollution of the aquifer. Neglecting the declaration exposes one to a fine and, in some departments, an obligation to fill the well at the owner’s expense.
Commissioning the Well After Drilling with a Thermal Auger
Once the final tubing is installed and the filter gravel is in place, the well requires development. This operation involves pumping a significant volume of water to remove fine particles accumulated during drilling and clear the openings of the screen.
- Pump until clear water free of sand is obtained, which can take several hours depending on the nature of the terrain.
- Install a submersible pump suitable for the diameter of the tubing and the depth of the aquifer.
- Place a watertight surface wellhead to protect the wellhead from runoff water infiltration and animal intrusions.
The quality of the development conditions the usable flow rate of the well in the long term. A poorly executed development leaves fine sand in the screen, which gradually reduces the flow and wears out the pump.
A well drilled with a thermal auger and properly tubed provides irrigation water for decades, provided that annual maintenance of the pump and a visual check of the static level of the aquifer are respected. Regulations are evolving rapidly regarding domestic drilling: checking the requirements of your prefecture before starting work remains the first truly essential step.